


My Method for Successful Dyeing with little to no fuss
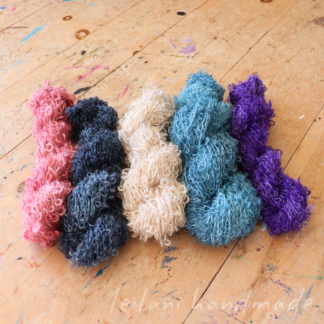
When dyeing wool yarn or fiber, some colors can be more difficult than others. Two colors that can be challenging to fully exhaust are red and turquoise. The other that took me a while to dye successfully is black.
When dyeing basic black, we can erroneously end up with a shade of grey, possibly because not enough dye was used or all the dye wasn’t exhausted into the yarn or fiber. Black is a spectrum of all shades, so sometimes the dominant colors will exhaust fully but leave other hues behind. For me, the best way to dye a color like black is low and slow. My slow dye method uses a crockpot. It works well for me every single time. Like most things in life, all good things come to those who wait.
I like this method because it’s easy for even new dyers to achieve successfully the first time. Plus, there’s no pre-mixing or need for pre-measuring ingredients ahead of time—just time and patience.
New to Making Videos
I’ve been trying my hand at making little instructional videos for the fiber and spinning community, and here’s another installment all about dyeing natural yarn black. In this case, I use a handspun Corriedale that was not set beforehand. I like to save time whenever possible, and the dyeing process will set the yarn since I must soak it anyway.
My fiber arts experience spans 12+ years, and being self-taught I feel the need to pass along my knowledge to support others in their fiber arts journey.
This particular video I decided to do without narrating, but added text on the screen to explain what I am doing. I’m trying out different styles of videos, and I liked leaving in the sounds involved with dyeing and just letting the video speak for itself.
Slow Dyeing
My preferred style of dyeing yarn and fiber in my home studio is “Slow Dyeing.” It involves a crockpot and time. This method works for me because I can pretty much set it and forget it. Instead of fussing over a dye pot, I can set the yarn in the dye and check on it whenever possible. For a busy maker mom like me, this method is great.
The only downside is you can’t be in a hurry. With patience, however, you get a perfectly dyed, fully exhausted dye pot with little to no setup. No (gasp!) math required. Just some basic knowledge of how much dye you should use for the size of skein/fiber dyed, the addition of citric acid, and even heat throughout.
The good news is that you can adjust as you go, so as long as you are patient, you should have perfectly dyed yarn.
In the video, I added the weight and size of the yarn I am dyeing basic black. Every brand of dye will differ, but this should give you a good idea of how much dye to use for 3.7oz of yarn or fiber.
What is your favorite method for dyeing basic black on wool yarn? Do you use a crockpot, steam in the oven or microwave, or a traditional dye pot? Maybe you find my method totally ridiculous, and that’s okay! Everyone needs to find the best way of honing their craft. I hope you enjoy the video, whether it inspires you or not. 🙂